 World Clock
Find a time to meet across time zones
Compare the local working hours of everyone on a call and share a time that works for the group.
Where to find itClocks › Meeting Planner
Read the chart
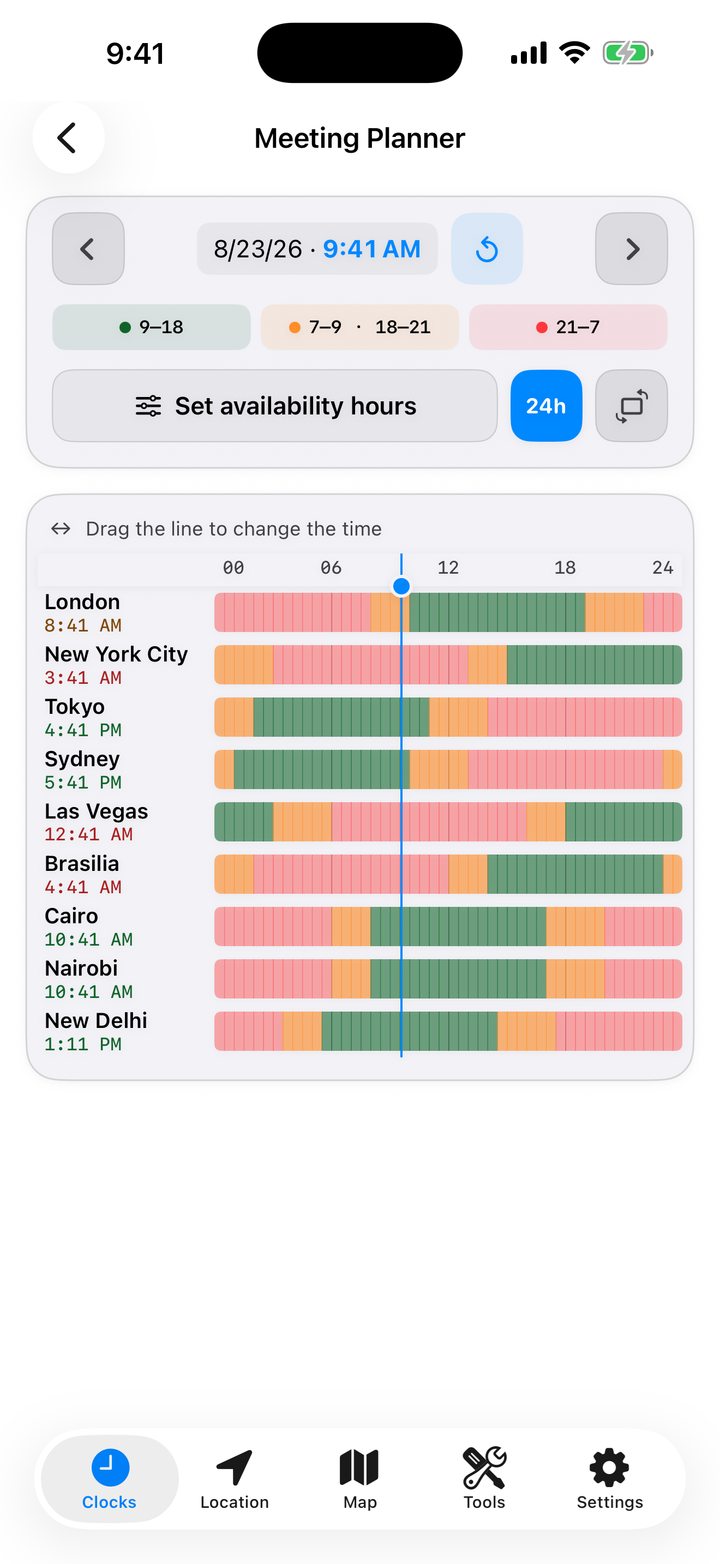
Each row is one of your favorite cities. The vertical blue line marks the same instant in every row. Green means available, orange means possible but inconvenient, and red means unavailable. The local time appears beside the city name.
Choose a time to call
- Add each participant’s city to Your favorites, then open Meeting Planner.
- Choose the date with the arrows on either side of it. This also accounts for any daylight saving change between now and the meeting.
- Drag the blue line to a time when both rows are green. If the green bands do not overlap, look for an orange band that works for someone.
- Read each city’s local date and time before sending the invitation. The circular arrow returns to now.
Set availability hours
Tap Set availability hours to change the three bands. Setting the green band to 9 AM–6 PM makes it begin at 9 AM in each city’s own local time.
Switch between the day and wide views
Tap 24h to switch between a full-day overview and a more detailed half-hour grid. The rectangle with arrows opens the wide landscape view so more cities fit on screen.
Share the schedule
Open the wide view and use its share control to send an image of the comparison. Each participant can read their own row.